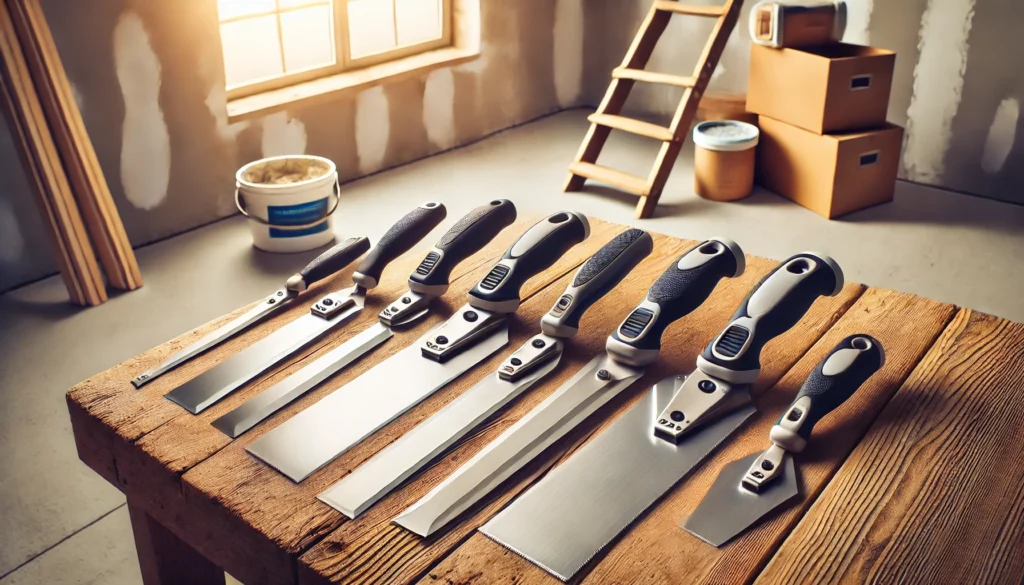
Drywalling is an essential skill in both professional construction and DIY home improvement. One of the most crucial tools for this task is the taping knife, a versatile tool for applying and smoothing joint compounds. But what size taping knife is best for drywall? Choosing the right size can be daunting, especially for beginners. This blog post will explore the different sizes of taping knives, their specific uses, and how to choose the right one for your drywall project.
What size taping knife for drywall? (Short Answer)
When starting with drywall, a 6-inch taping knife is excellent for applying the first layer of joint compound. An 8—or 10-inch knife works well for broader areas and smoother finishes. Finally, a 12-inch knife is best for final coats and large surfaces. Having a few sizes helps handle different stages of the drywall process efficiently. Choose sizes based on your project needs for optimal results.
Why Taping Knives Matter
Before diving into the specifics of taping knife sizes, it’s essential to understand why this tool is so critical. Taping knives are primarily used for:
- Applying Joint Compound:
Also known as “mud,” joint compound is essential for covering seams between drywall sheets and embedding drywall tape.
- Smoothing Surfaces:
A taping knife helps achieve a smooth, even surface, which is crucial for a professional-looking finish.
- Feathering Edges:
The tool helps blend the edges of the joint compound into the drywall, making the seams less noticeable.
Understanding Taping Knife Sizes
Taping knives come in various sizes, typically ranging from 4 inches to 14 inches. Each size has its unique purpose, and understanding these can help you select the right tool for your job.
4-Inch Taping Knife
- Primary Use:
Applying joint compound to small areas and filling holes
- Advantages:
Easy to handle and perfect for tight spaces
- Ideal For:
Patching small holes, corners, and narrow seams
6-Inch Taping Knife
- Primary Use:
Applying the first coat of joint compound over drywall tape
- Advantages:
Slightly wider blade allows for more coverage while still being easy to control
- Ideal For:
First coat over taped seams and fill medium-sized holes
8-Inch Taping Knife
- Primary Use:
Spreading joint compound over larger areas
- Advantages:
Provides a balance between control and coverage
- Ideal For:
Second coat over seams, feathering edges, and minor wall repairs
10-Inch Taping Knife
- Primary Use:
Applying the final coat of joint compound
- Advantages:
Wide blade offers extensive coverage, reducing the number of passes needed
- Ideal For:
Smoothing out seams, final coats, and feathering broad areas
12-Inch Taping Knife
- Primary Use:
Finishing large drywall surfaces
- Advantages:
Covers large areas quickly and efficiently
- Ideal For:
Final smoothing of large walls and ceilings
14-Inch Taping Knife
- Primary Use:
Extensive drywall projects and professional use
- Advantages:
Maximum coverage, ideal for large-scale jobs
- Suitable For:
Professional drywall installers working on extensive projects
Factors to Consider When Choosing a Taping Knife
Selecting the right taping knife isn’t just about size. Several other factors can influence your choice:
Material of the Blade
- Stainless Steel:
Durable and resistant to rust, making it a long-lasting option.
- Carbon Steel:
Offers flexibility but requires proper maintenance to avoid rust.
- Plastic:
Lightweight and inexpensive but less durable and unsuitable for extensive work.
Flexibility
The blade’s flexibility is crucial for achieving a smooth finish. More flexible blades are better for feathering edges, while stiffer blades are ideal for applying joint compounds.
Handle Comfort
A comfortable handle can make a significant difference, especially for extended use. Look for ergonomic designs that reduce hand fatigue.
Project Scope
Consider the size and scope of your project. Smaller knives are better for detailed work, while larger knives are ideal for extensive drywall installations.
Step-by-Step Guide to Using a Taping Knife
Now that you understand the various sizes and their uses let’s review an essential step-by-step guide to using a taping knife effectively.
Step 1: Prepare Your Surface
Ensure that your drywall surface is clean and free of dust. Any debris can affect the adhesion of the joint compound.
Step 2: Apply the First Coat
Use a 4-inch or 6-inch taping knife to spread a thin layer of joint compound over the seams. Press drywall tape into the compound and smooth it with the same knife.
Step 3: Apply the Second Coat
Once the first coat is dry, switch to an 8-inch knife. Apply another thin layer of joint compound, feathering the edges to smooth the transition.
Step 4: Final Coat
After the second coat has dried, use a 10-inch or 12-inch knife to apply the final coat of the joint compound. Ensure that the surface is smooth and the edges are well-feathered.
Step 5: Sanding
Once the final coat is completely dry, lightly sand the surface to remove imperfections. Your wall is now ready for priming and painting.
Conclusion:
Choosing the right size taping knife for drywall is crucial for achieving a professional finish. Each size serves a unique purpose, from the 4-inch knife for minor repairs to the 14-inch knife for extensive projects. By understanding the different sizes and their specific uses, you can make an informed decision that will help you confidently tackle your drywall project. Whether you’re a professional drywall installer, a DIY enthusiast, or part of a handyperson service, selecting the right taping knife can make all the difference in the quality of your work. So, take your time, choose wisely, and enjoy the satisfaction of a job well done.
Thank you for reading! If you have any questions or tips, feel free to share them in the comments below.
FAQs
A 4-inch taping knife is ideal for small holes. Its smaller size allows for easy handling and precise application of joint compounds.
A 6-inch taping knife is best suited for the first coat of drywall tape. It provides enough coverage while still being manageable for detail work.
An 8-inch taping knife is perfect for the second coat over seams and feathering edges. It offers a good balance between control and surface area coverage.
For the final coat, a 10-inch or 12-inch taping knife is recommended. These larger knives help achieve a smooth, even finish over vast areas.
A 14-inch taping knife is typically used for extensive drywall projects and professional use. It covers large areas quickly but may need more time for smaller DIY tasks.
A 6-inch knife is used to apply the first layer of joint compound to the drywall. A 10-inch or 12-inch knife works best for feathering out edges and applying final coats. These sizes help achieve a smooth finish.
A 4-inch drywall knife is used for small patch jobs and tight spaces. It helps apply joint compounds smoothly to narrow areas. This size is perfect for detail work around corners and edges.
For drywall, use different knives, such as a 6-inch joint knife for first coats and a 12-inch knife for final smoothing. A 4-inch knife is excellent for tight areas and corners. Each size helps you achieve a smooth finish.

