Have you ever struggled to sharpen your hawkbill knife? You’re not alone. Knife enthusiasts and outdoor adventurers know this uniquely curved blade presents unique challenges. But fear not—with the proper techniques and tools, you can keep your hawkbill knife razor-sharp and ready for any task. In this guide, we’ll walk you through the steps to effectively sharpen a hawkbill knife, ensuring it remains an indispensable tool in your collection.
How to Sharpen a Hawkbill Knife? (Short Answer)
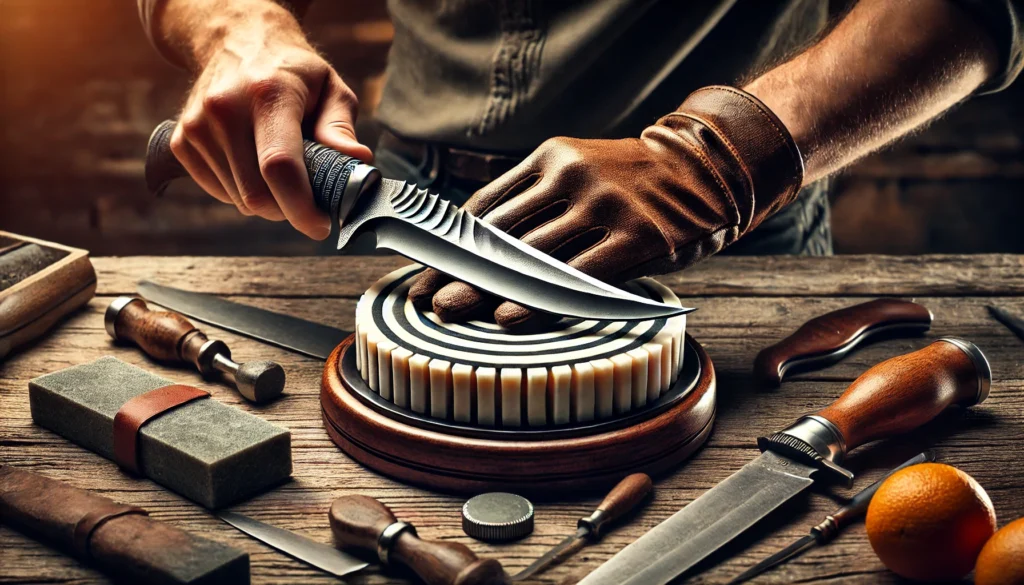
First, secure the hawkbill knife in a clamp or vice to keep it steady. Use a round sharpening rod and follow the blade’s curve, moving the rod away from you. Work both sides evenly until you form a burr along the edge. Then, switch to a finer grit rod for a smoother finish. Finally, lightly hone the edge on a piece of leather to polish and remove any burrs.
Understanding the Hawkbill Knife
What Is a Hawkbill Knife?
A hawkbill knife features a curved blade resembling a hawk’s talon. This design makes it ideal for tasks requiring precise cuts and control. It’s a versatile addition to any knife collection, commonly used in gardening, rope work, and even self-defense.
Why Is It Popular?
The hawkbill knife’s popularity stems from its unique shape and functionality. Its curved blade allows for powerful slicing motions, making it perfect for cutting through rigid materials. Whether you’re a gardener needing to prune plants or an outdoor enthusiast preparing for a hiking trip, the hawkbill knife is a reliable companion.
Challenges in Sharpening
Sharpening a hawkbill knife can be tricky due to its curved blade. Unlike straight-edged knives, which can be sharpened on a flat stone, the hawkbill knife requires a more nuanced approach. But with the proper methods, you can maintain its edge and keep it performing at its best.
Tools You’ll Need
Selecting the Right Sharpening Stone
Choosing the suitable sharpening stone is crucial for maintaining your hawkbill knife. Look for a stone with multiple grits to handle various stages of sharpening. A fine-grit stone will help you achieve a razor-sharp edge, while a coarser stone is helpful for initial sharpening.
Exploring Different Types of Stones
Different sharpening stones, including water, oil, and diamond stones, are available. Each has its pros and cons. Water stones offer a smooth finish but require regular soaking, while oil stones are durable but can be messy. Diamond stones, however, provide quick results and are long-lasting.
Other Essential Tools
In addition to a sharpening stone, you’ll need a honing rod to maintain the edge between sharpening sessions. A leather strop is also handy for polishing the blade. Finally, consider using a sharpening guide to ensure consistent angles during the sharpening process.
Step-by-Step Sharpening Guide
Step 1: Prepare Your Tools
Before you begin, gather all your tools and set up a comfortable workspace. Ensure your sharpening stone is clean and, if necessary, soaked in water or coated with oil.
Step 2: Establish the Angle
The key to effective sharpening is maintaining a consistent angle. Aim for an angle between 15 and 20 degrees for a hawkbill knife. A sharpening guide can help keep this angle throughout the process.
Step 3: Start with the Coarse Grit
Begin by using the coarse grit side of your sharpening stone. Hold the knife at the established angle and use a sweeping motion to move the blade along the stone. Focus on the curved section, ensuring even pressure and coverage.
Step 4: Switch to Fine Grit
Once you’ve removed any nicks and established an essential edge, switch to the fine-grit side of the stone. Repeat the sweeping motion, aiming for a polished, razor-sharp edge. Take your time and make sure each pass is smooth and controlled.
Step 5: Hone the Edge
After sharpening, use a honing rod to refine the edge. Hold the rod vertically and draw the blade down and across the rod, maintaining the sharpening angle. This step helps realign the edge and remove any remaining burrs.
Step 6: Strop for Polishing
Finish by stropping the blade on a leather strop. This final step polishes the edge, enhancing its sharpness and durability. Draw the knife away from the edge in a smooth, controlled motion.
Common Mistakes to Avoid
Using the Wrong Angle
One of the most common mistakes is using the wrong angle. An incorrect angle can damage the blade and reduce its effectiveness. Always use a sharpening guide if you need clarification on maintaining the correct angle.
Applying Too Much Pressure
Applying too much pressure can cause uneven sharpening and potential damage to the blade. Use light, even pressure, to ensure a consistent edge.
Neglecting Regular Maintenance
Sharpening your hawkbill knife is just part of the equation. Regular maintenance, including honing and stropping, is essential for keeping the blade in top condition. Please make sure to give it attention before the knife is dull.
Advanced Techniques
Freehand Sharpening
For those with more experience, freehand sharpening offers greater control and precision. This technique requires practice but can yield excellent results once mastered.
Using a Sharpening Jig
A sharpening jig can help maintain consistent angles and pressure. This tool is handy for beginners, providing a stable platform for sharpening your hawkbill knife.
Incorporating a Sharpening Rod
A sharpening rod with a diamond coating can be used for touch-ups between full sharpening sessions. This tool is excellent for maintaining the edge during extended use.
Maintaining Your Sharpening Tools
Cleaning Your Sharpening Stone
Regularly clean your sharpening stone to remove metal particles and debris. Use a brush and mild detergent to keep the stone in good condition and ensure effective sharpening.
Storing Your Tools Properly
Store your sharpening tools in a dry, cool place to prevent rust and damage. Consider using a dedicated toolbox or storage case to keep everything organized and protected.
Replacing Worn-Out Tools
Over time, your sharpening tools may wear out and become less effective. Monitor their condition and replace them as needed to maintain optimal performance.
Real-Life Applications
Gardening and Pruning
A sharp hawkbill knife is invaluable for gardening and pruning tasks. Its curved blade allows for precise cuts, making it easier to trim plants and remove unwanted growth.
Rope Work and Sailing
A hawkbill knife is a must-have tool for those involved in rope work or sailing. Its design makes cutting through ropes and lines quick and efficient.
Everyday Carry and Self-Defense
Many knife enthusiasts carry a hawkbill knife as part of their everyday gear. Its unique shape and sharp edge make it a versatile tool for various tasks, including self-defense.
Expert Tips for Sharpening Success
Practice Makes Perfect
Sharpening a hawkbill knife takes practice and patience. Don’t be discouraged by initial challenges; keep practicing, and you’ll improve.
Seek Professional Help
If you need more clarification about your sharpening skills, consider seeking help from a professional. Many knife shops offer sharpening services and can provide valuable tips and guidance.
Stay Informed
Stay updated on the latest sharpening techniques and tools. Join online forums, read articles, and watch tutorials to enhance your knowledge and skills.
Additional Tips for Optimal Sharpening
- Use a lubricant on your sharpening stone to prevent metal particles from clogging the surface.
- Take breaks during the sharpening process to avoid overheating the blade.
- Practice proper grip and hand positioning to maintain control while sharpening.
- Consider
Conclusion:
Sharpening a hawkbill knife may seem daunting, but it’s manageable with the right tools and techniques. By following this guide, you’ll keep your knife in excellent condition, ready for any task that comes your way. Remember to prioritize safety and precision, and don’t be afraid to seek help or try new techniques. With practice and dedication, you’ll master maintaining consistent angles during the sharpening process. So keep your hawkbill knife sharp and ready for action!
FAQs
The frequency depends on how often you use your knife. For regular use, sharpening every few weeks should suffice. If you notice the blade becoming dull, it’s time to sharpen.
It’s best to use a high-quality sharpening stone designed for curved blades. Stones with coarse and fine grits will help you achieve a sharp edge.
A honing rod and a leather strop will help keep your knife’s edge aligned and polished. This ensures the blade remains sharp and ready for use.
Maintain an angle between 15 and 20 degrees. Consistently using this angle will result in a sharp and effective blade.
If you see deep scratches on the blade or it feels uneven, you might be pressing too hard. Use light, even pressure, to maintain a smooth and sharp edge.
Sharpening a cutting knife is simple. First, hold the knife at the correct angle against the sharpening stone. Then, glide it back and forth evenly until the blade is sharp.
Hold the blade at a slight angle to a sharpening stone to sharpen a bird’s beak knife. Move it in small, circular motions to keep the curved tip sharp. Finish by honing with a fine grit to polish the edge.
Use a sharpening rod that fits into the serrations to sharpen a serrated knife. Move the rod back and forth in each groove to sharpen. Then, lightly hone the flat side to remove any burrs.

