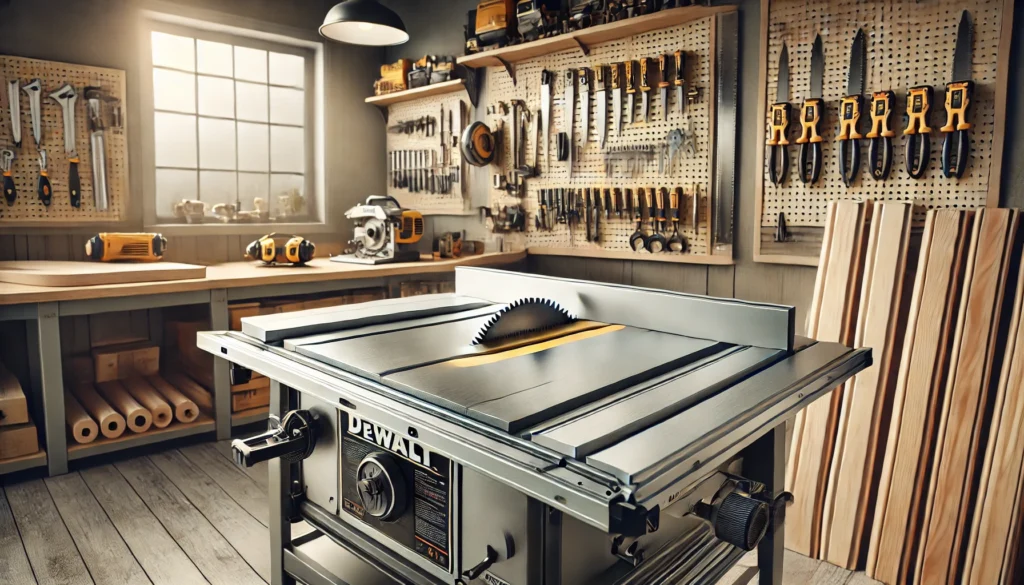
The riving knife on a DeWalt table saw is a safety feature that prevents kickback and ensures smoother and safer cuts. Knowing how to adjust the riving knife on a DeWalt table saw is crucial for maintaining its effectiveness. Whether you are a professional woodworker or a DIY enthusiast, properly adjusting the riving knife is essential for safe and effective table saw use. This guide will walk you through the process, step by step, ensuring you can perform the adjustment safely and correctly.
How to Adjust the Riving Knife on a DeWalt Table Saw? (Short Answer)
Step-by-Step Instructions to Adjust the Riving Knife
- Turn Off and Unplug the Saw:
Always ensure your table saw is off and unplugged before making any adjustments.
- Remove the Throat Plate:
Remove the throat plate to access the receiving knife.
- Loosen the Riving Knife Lock:
Locate the Riving knife lock and use a wrench to loosen it.
- Adjust the Riving Knife Height:
Move the riving knife to the desired position, ensuring it’s aligned with the blade.
- Tighten and Reassemble:
Tighten the receiving knife lock and reattach the throat plate before using the saw.
What is a Riving Knife?
A riving knife is a metal blade positioned behind the saw blade on a table saw. Its purpose is to keep the cut material from pinching the saw blade, which can cause dangerous kickback. The riving knife moves up and down with the blade and maintains a consistent distance from it, making it more efficient than older splitter designs.
Why Adjust the Riving Knife?
Adjusting the riving knife is crucial for several reasons:
- Safety:
Proper adjustment prevents kickback, which can lead to serious injury.
- Performance:
Ensures smoother cuts and reduces the likelihood of binding.
- Accuracy:
Keeps the material aligned, resulting in more precise cuts.
Tools Needed
Before you start, gather the following tools:
- Wrenches (typically included with your DeWalt table saw)
- Screwdriver
- Safety gloves
- Eye protection
Step-by-Step Guide to Adjusting the Riving Knife
Step 1: Turn Off and Unplug the Saw
Safety first! Ensure the table saw is turned off and unplugged from the power source. This step is crucial to prevent accidental starts while adjusting the riving knife.
Step 2: Remove the Throat Plate
The throat plate is the flat piece surrounding the saw blade on the table’s surface. To access the riving knife, you’ll need to remove this plate. Depending on your saw model, use a screwdriver or your hands to lift the plate from its slot.
Step 3: Locate the Riving Knife Locking Mechanism
You should see the receiving knife behind the saw blade with the throat plate removed. Look for the locking mechanism, which typically involves a lever or a set of nuts and bolts that hold the receiving knife in place.
Step 4: Loosen the Locking Mechanism
Use the appropriate wrench to loosen the receiving knife’s nuts or bolts. If your model uses a lever, lift or turn it to unlock the knife. You do not need to remove the nuts or bolts entirely; loosen them enough to allow for adjustment.
Step 5: Adjust the Riving Knife Height
The riving knife should be positioned so that its top edge is slightly lower than the highest point of the saw blade teeth. This ensures the knife effectively prevents kickback without interfering with cutting. Move the riving knife up or down to achieve the correct height.
Step 6: Align the Riving Knife with the Saw Blade
Ensure the receiving knife is perfectly aligned with the saw blade. It should be centered and parallel to the blade to prevent binding during cuts. You can use a straight edge or ruler to check the alignment.
Step 7: Tighten the Locking Mechanism
Once the receiving knife is correctly positioned and aligned, retighten the nuts or bolts or lock the lever to secure the receiving knife in place. Double-check to ensure it is firmly closed and will not move during operation.
Step 8: Reinstall the Throat Plate
Place the throat plate back into its slot and secure it. Ensure it sits flush with the table surface and does not interfere with the saw blade or riving knife.
Step 9: Test the Adjustment
Plug the table saw back in and turn it on. Slowly raise and lower the saw blade to ensure the riving knife moves correctly with it and remains appropriately aligned. Make a few test cuts on scrap wood to verify the adjustment.
Tips for Safe Operation
- Always wear safety glasses and gloves when working with power tools.
- Keep the workspace clean and free of debris.
- Regularly inspect the receiving knife and other safety features for wear and tear.
Common Mistakes to Avoid
- Failing to unplug the saw before adjustments.
- Incorrectly positioning the riving knife, leading to ineffective kickback prevention.
- The receiving knife was improperly secured, causing it to move during operation.
Conclusion:
Adjusting the receiving knife on your DeWalt table saw is a straightforward process that significantly enhances your safety and the quality of your work. By following these steps meticulously, you can ensure your riving knife is always in the optimal position to prevent kickback, align materials, and produce smooth, accurate cuts. Regular maintenance and adjustment of your table saw’s safety features will help you maintain a safe and efficient workshop.
Feel free to ask questions or share your experiences in the comments below.
FAQs
The riving knife is essential because it helps prevent kickback, which can be dangerous. It keeps the cut material from pinching the saw blade, making your cuts safer and smoother.
You should check the riving knife’s adjustment before using your table saw. Regular checks help ensure the knife is in the correct position and securely locked.
If the riving knife is not aligned with the saw blade, you need to loosen the locking mechanism and adjust it until it is perfectly centered and parallel to the blade. Use a straight edge or ruler to verify proper alignment.
You should never adjust the riving knife while the saw is running. To avoid accidents, always turn off and unplug the table saw before changing it.
You will need wrenches (usually included with your table saw), a screwdriver, safety gloves, and eye protection to adjust the receiving knife. These tools will help you make the necessary adjustments safely and accurately.
First, to align a riving knife, ensure it is loose enough to move. Use a straight edge to ensure it is parallel with the saw blade. Then, tighten the locking mechanism to hold it in place.
First, unplug the saw and remove the throat plate. Next, loosen the locking mechanism, holding the receiving knife in place. Finally, carefully slide the riving knife out from behind the saw blade.
It would help to avoid using a riving knife when making non-through cuts, such as dados or grooves. The blade doesn’t go entirely through the material in these cuts, so the riving knife would obstruct the process.
First, loosen the bolts holding the blade in place to adjust the alignment. Use a square or ruler to check that the blade is parallel to the fence. Once aligned, tighten the bolts securely.
Yes, the riving knife should be slightly thinner than the saw blade but thicker than the blade’s kerf. This helps prevent binding and ensures smooth, safe cuts.


